Many users overlook the importance of their power supply unit (PSU) when focusing on upgrading hardware like a CPU or GPU. However, knowing your power supply’s details is just as important. Unlike other components, power supply information isn’t readily available through software in Windows. If you’ve ever tried to check your PC’s power supply, you know it’s not as simple as checking your processor or graphics card specs. This guide will walk you through some practical methods to help solve this issue and ensure your computer runs smoothly.
Why Your Power Supply Matters
Your PSU is a crucial component because it provides power to every part of your hardware. Whether you’re planning to install new devices, upgrade to a more powerful graphics card, or swap out your processor, knowing the capacity (or wattage) of your power supply is essential. An insufficient PSU can cause serious problems, such as system instability, random restarts, or even permanent damage to your hardware.
Steps to Check Your Power Supply on PC
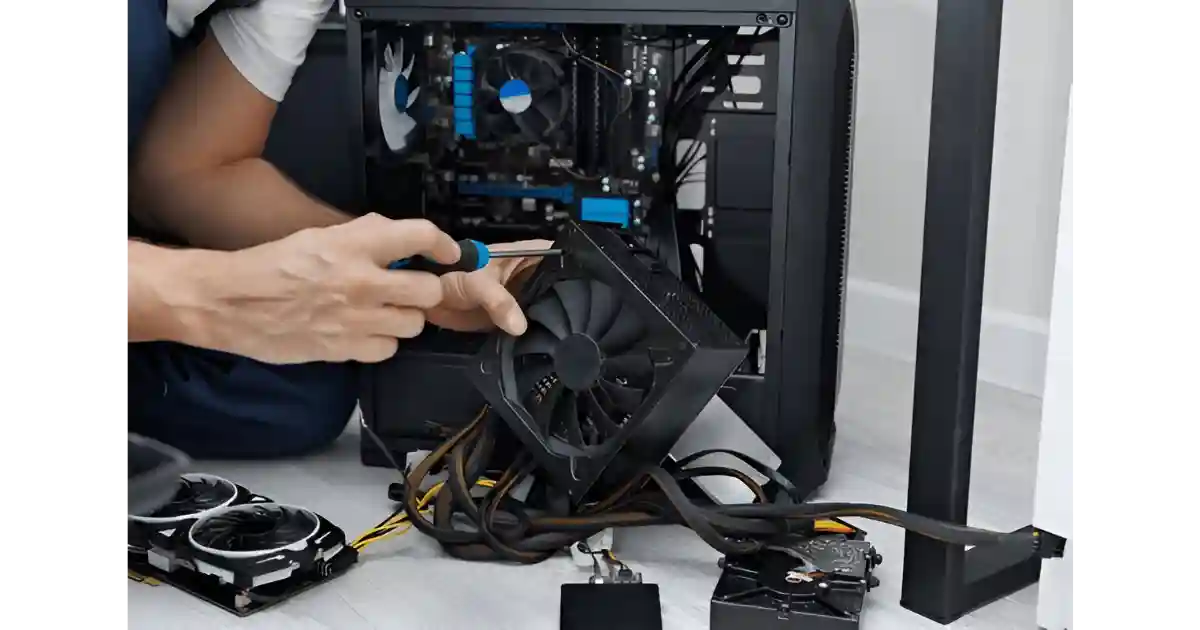
Since Windows software doesn’t display power supply information, the best way to check your PSU is by physically inspecting it. Open your PC case and look for a label on the power supply unit that lists its wattage and other specifications. If you’re unsure, referring to your computer’s manual or looking up the PSU model online can also provide useful details. Understanding these components will help you make informed decisions about upgrading and maintaining your hardware effectively. Here are Some Steps to check power Supply on pc.
How to Identify Your Power Supply Label
Many people try to find power supply details through Windows, but there is no direct access to this information. The most accurate way to identify your PSU is by physically inspecting it. This method requires opening your computer, but it ensures you get the correct information about the brand, model, and wattage of your power supply.
Steps to Physically Inspect Your PSU
To safely check your power supply, follow these steps:
- Turn off your PC completely and unplug the power cable for safety reasons.
- Open the case using a screwdriver if necessary.
- Locate the PSU inside your computer. It is usually mounted at the top or bottom of the case.
- Find the label on the side of the power supply. It will display important details like the brand, model, and wattage (e.g., 500W).
How to Use Software to Check Power Usage
If you don’t want to open your case, you can use software tools to estimate how much power your current hardware is using. While these programs won’t tell you the exact PSU model or wattage, they can give you a good idea of your system’s total power demand. This helps you assess whether your PSU is sufficient for upgrades or if you need a more powerful unit.
Recommended Tools to Monitor Power Usage
Two of the most recommended software tools for this task are:
- HWMonitor – This tool displays real-time information about your CPU, GPU, and motherboard, including voltage, temperature, and power consumption data. By checking these values, you can get an estimate of your system’s overall power demand.
- Open Hardware Monitor – Similar to HWMonitor, this software provides detailed performance stats, including information about power consumption and other hardware metrics.
Steps to Use These Tools
To check your system’s power usage, follow these steps:
- Download and install either HWMonitor or Open Hardware Monitor.
- Run the software and let it analyze your components.
- Check the power consumption data, which is measured in watts.
- While it doesn’t show your PSU wattage, it helps you understand your system’s power needs.
Using software is a simple way to estimate your power consumption without opening your case. This method ensures you stay informed about your hardware’s performance before making any changes.
How to Find Your Power Supply Without Opening Your PC
If you own a pre-built PC, you might be able to find the power supply details without opening your system. Many manufacturers provide this information on their official website, making it easy to check your PSU details. You can also refer to your purchase history, packaging, or product description to see if the power supply details are listed.
Ways to Find Power Supply Information
Here are some examples of how you can locate your PSU details:
- Manufacturer’s Website – Visit the official website of your PC brand, such as Dell or Lenovo. Enter your PC model in the search bar and review the specifications to find power supply details.
- Purchase History – If you bought your PC online, go to your order records. Check the order details or product description for PSU specifications.
- Packaging – If you still have the box your PC came in, it may list the power supply details along with other specifications.
Checking these sources can save you time and effort, especially if you don’t want to open your PC to inspect the power supply directly.
How to Choose the Right Power Supply
Choosing the right PSU is important, whether you are upgrading or replacing your current one. The power supply is the heart of your system, and making the wrong choice can lead to poor-quality performance or even damage your hardware. To avoid issues, follow these tips to ensure your PSU meets your system’s needs.
Key Factors to Consider
- Determine Power Requirements – Your GPU, CPU, and other components affect how much wattage you need. A standard home PC may only need 400W, but gaming rigs or workstations often require 600W or more.
- Brand and Quality – Always invest in a reputable brand to ensure reliability and safety. A poor-quality PSU can shorten your PC’s lifespan or even pose risks like overheating or failure.
- Efficiency Rating – Look for an 80 Plus Certified PSU. These are more energy-efficient, which helps in reducing heat output and waste, making your system run cooler and last longer.
How to Find the Right PSU
Since Windows does not directly provide information about your power supply, use different methods to solve this issue:
- Physically check the label on your PSU.
- Use software to estimate power usage.
- Review specifications from the manufacturer’s site.
When planning an upgrade, make sure the PSU meets your system’s demands for stable performance.
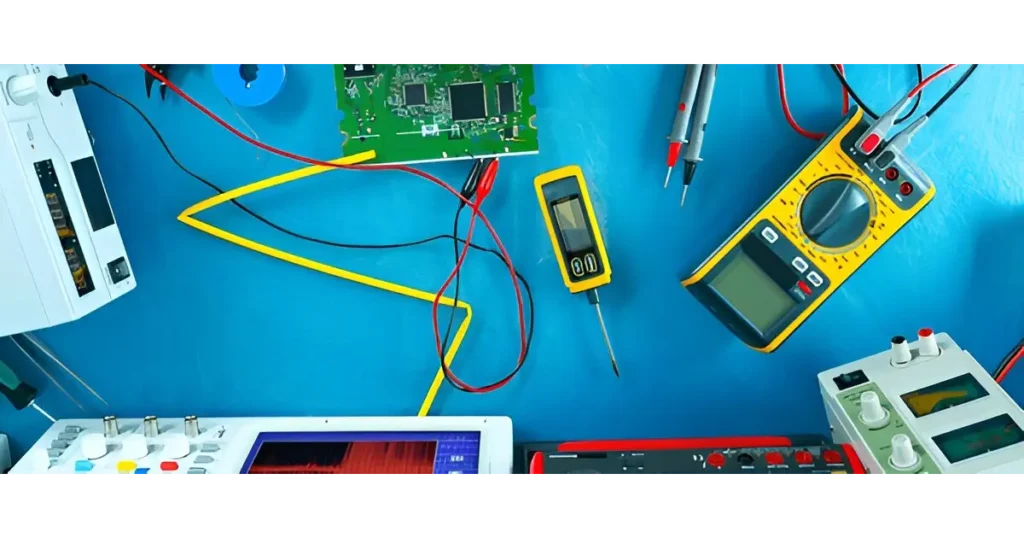
How to Manually Test a Power Supply With a Multimeter
Testing a power supply manually with a multimeter is one of the two ways to check if your computer is running properly. A PSU test can confirm if your power supply is in working order or needs to be replaced.
Stay Safe Before You Begin
Before you begin, it’s essential to read some important PC repair safety tips. This process involves working closely with high voltage electricity, which is dangerous.
- Primary concern should be your safety.
- Be aware of several points before starting.
- Always turning off and removing the power cable before handling anything.
- Unplugging all connected devices from the outside of your computer.
Open the Case and Prepare for Testing
To access the power supply, you need to open your computer case carefully.
- Move the disconnected PC somewhere easy to work, like a table or another flat, non-static surface.
- Unplug the power connectors from each internal device to ensure safety.
- Keep the bundle of cables together, organizing the group of wires to avoid confusion.
- There’s no need to remove the actual unit or data cables originating from the PSU.
Short the Right Pins
To power on the PSU without the motherboard, you need to short pins 15 and 16 on the 24-pin motherboard power connector.
- Use a small piece of wire to complete the circuit.
- Check the ATX 24-pin 12V Power Supply Pinout to locate these pins correctly.
- Confirm the voltage switch is properly set for your country (e.g., US needs 110V/115V).
- If testing in another country, use the Foreign Outlet Guide to check voltage settings.
Power On and Listen for the Fan
- Plug the PSU into a live outlet and flip the switch on the back.
- Assuming the PSU is at least minimally functional, you should hear the fan run.
- Some PSUs don’t have a switch—in that case, the fan should run immediately after plugging it into the wall.
- However, just because the fan is running doesn’t mean it’s supplying power correctly.
Use a Multimeter to Test Voltages
Now, it’s time to turn on your multimeter and dial it to VDC (Volts DC).
- If your multimeter doesn’t have an auto-ranging feature, set it to 10.00V range.
- Insert the negative probe (black) into any ground wired pin.
- Use the positive probe (red) to test the first power line.
Check Voltages on the 24-Pin Connector
The 24-pin main power connector should have these readings:
- +3.3 VDC, +5 VDC, -5 VDC (optional), +12 VDC, -12 VDC.
- Refer to the ATX 24-pin 12V Power Supply Pinout to locate the multiple voltage points.
- I recommend checking every pin that carries voltage.
- Document the number displayed on the multimeter for each test.
Compare Readings to Approved Tolerances
- Cross-check the reported voltages with approved tolerance levels.
- Use the power supply voltage tolerances to verify proper ranges.
- If any voltage is outside the limits, replace the PSU immediately.
- If all values are normal, the PSU isn’t defective.
Further Testing for Stability
Even if your PSU passes, it’s recommended to operate it under a load.
- If you’re not interested, you can skip to Step 15 and reconnect everything.
- Otherwise, proceed with load testing to ensure stability.
Reconnect and Power On Your PC
- Turn off the switch and unplug the PSU.
- Reconnect all internal devices and remove the short created earlier.
- Plug the main power connector back into the motherboard.
- Don’t forget to supply power to hard drive(s), optical drive(s), and floppy drive.
- Some motherboards need an additional 4-pin, 6-pin, or 8-pin connection.
- Certain video cards also require dedicated power.
Final Steps
- Plug in the PSU and flip the switch if there’s one.
- Turn on your PC normally, even with the case cover off.
- It’s safe, but be careful while handling components.
- If the PC doesn’t turn on, check if you need to move an appropriate jumper—refer to your motherboard manual for details.
Test Other Power Connectors
Repeat the test for other power connections, including:
- 4-pin peripheral power connector
- 15-pin SATA power connector
- 4-pin floppy power connector
Use the ATX Power Supply Pinout Tables to find the correct pinouts.
- If any voltage is listed outside the recommended range, replace the PSU immediately.
Wrapping Up Testing
- Once all testing is complete, unplug the system and put the cover back on.
- If your PSU tested good, or you’ve replaced it with a new one, you can turn back on your PC and continue troubleshooting any remaining problem.
Troubleshooting Power Issues
When facing troubleshooting power issues, identifying your power supply’s specifications can help diagnose potential failures. If your system is experiencing frequent crashes or unexpected shutdowns, your PSU might not be delivering enough power to the components. In such cases, replacing the power supply unit with one that has a higher wattage can prevent further instability and hardware failures.
Frequently Asked Questions
How do I know if my power supply unit (PSU) is failing?
Common signs of a failing PSU include random shutdowns, crashes, instability, restarts, and insufficient power to components like the CPU, GPU, and graphics card. If your computer struggles to stay on or shows performance issues, your PSU may need testing or replacing.
How can I check my PSU’s wattage and capacity?
You can find the wattage on the label of your PSU or in the manual. To assess if it meets your system’s demand, use tools like HWMonitor or Open Hardware Monitor to check real-time voltage, power consumption, and temperature.
What happens if my PSU wattage is insufficient?
An insufficient PSU can cause system crashes, instability, component failures, and even permanent damage. A higher capacity PSU ensures your computer runs smoothly and meets the power needs of your hardware.
How do I safely replace my PSU?
First, turn off, unplug, and open the case. Use a screwdriver to remove the mounted PSU, disconnect power connectors, and carefully install the new one. Make sure it has the proper wattage, connectors, and efficiency rating to avoid future issues.
What PSU specifications should I consider when upgrading?
Always check your system’s specs, PSU wattage, brand, model, and power requirements. Brands like Dell and Lenovo provide official websites where you can search for compatible PSUs. For gaming or a workstation, consider 400W, 500W, or 600W models with 80 Plus Certified efficiency.
How can I test if my PSU is still working?
There are two ways to test your PSU: using a multimeter or a PSU tester. To manually check, disconnect, locate the 24-pin motherboard connector, and use a small piece of wire to short pins 15 and 16. If the fan runs, your PSU is at least minimally functional, but voltage readings are needed for accurate diagnostics.
What are the risks of using a low-quality PSU?
A poor quality PSU can cause failures, overheating, reduced lifespan, electrical hazards, and even fire risks. To ensure reliability and safety, always choose a brand with approved power tolerances and energy-efficient ratings like 80 Plus Certified.
Conclusion
A power supply unit (PSU) is the heart of your computer, and choosing the right one is crucial for performance, safety, and hardware longevity. Whether you’re troubleshooting issues, upgrading, or simply maintaining your system, always consider wattage, efficiency, and power needs. Investing in a reliable PSU helps avoid problems like shutdowns, crashes, and damage, ensuring your computer runs smoothly for years to come.