How to Add More Storage to PC for Gaming
Games manufactured today diverge substantially from the ones developed ten years ago. Games such as Call of Duty, Cyberpunk 2077, and Star field need many gigabytes of storage space, which causes your computer to display storage warnings. If you love playing everything directly from your hard drive, then you probably experience these alerts. Knowing how to add more storage to a PC for gaming is important when playing games because it allows you to advance through the hidden knowledge embedded within high-quality and high-capacity video games available in the world.
This guide provides complete information about storage selection, including disk choices and installation procedures, to achieve the best performance during gaming sessions. The article possesses the capability to attract Internet g-spot visitors with experience and knowledge combined with authority and trustworthiness and Google’s preferences.
Why Storage Matters in Gaming
The primary function of storage exists beyond a supplemental space on personal computers. After understanding how to add more storage to a PC for gaming, you gain more than additional game titles. You’re also
SSDs help enhance loading times to a significant extent when added to systems.
Various types of video games exist that either eat up all available disk space or replicate themselves until the entire storage space runs out.
These implementation methods enable system support enhancement through creating operational space in the background.
These games have grown tremendously large, while their updates match the extreme file sizes from the 2000s game installations. A user who manages 256GB or 512GB of drive storage typically spends their time playing different games frequently. It’s time for an upgrade.
The discussion focuses on analyzing hard disk drive storage and solid-state drive storage as well as non-volatile memory express.
The following set of options should be examined prior to uniting:
1. Hard Disk Drive (HDD)
Pros: Affordable and available in large capacities (1TB+).
Cons: Slower read/write speeds.
Players who prefer retro games as well as those who do little in-game movement should select this storage setup.
2. Solid State Drive (SSD)
Pros: Faster loading, smoother performance.
Cons: More expensive than HDDs.
Best for: Running your most-played games.
3. NVMe SSD (M.2 format)
Pros: Blazing-fast speeds, compact form factor.
This technology features high costs together with a necessary expansion slot installation.
These storage devices provide maximum performance for people who fight professionally or play intense video games.
Successful How to Add More Storage to PC for Gaming selection demands knowledge of the gaming pattern along with what fits within a particular budget.
Step-by-Step: How to Add More Storage to PC for Gaming
Here’s where things get practical. The actual process of drive addition or replacement proves simpler than the detailed description describes.
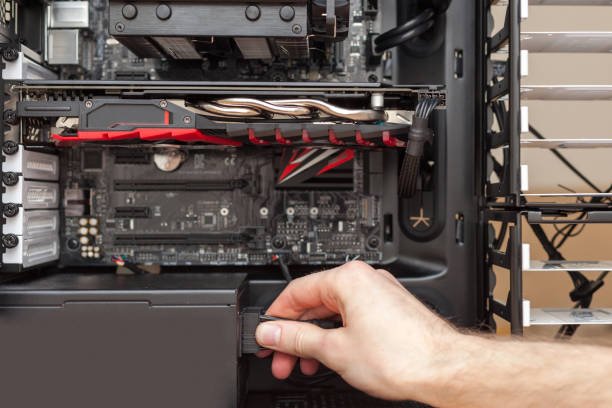
Step 1: Check Your Available Slots
Gain access to your PC case carefully before inspecting the available M.2 slots and bays for possible installation locations. Modern mainboards include one or more M.2 slots together with a 2.5” SSD bay and a 3.5” HDD bay. One should always make their choice based on the available space. How to Add More Storage to PC for Gaming during this Assessment Process.
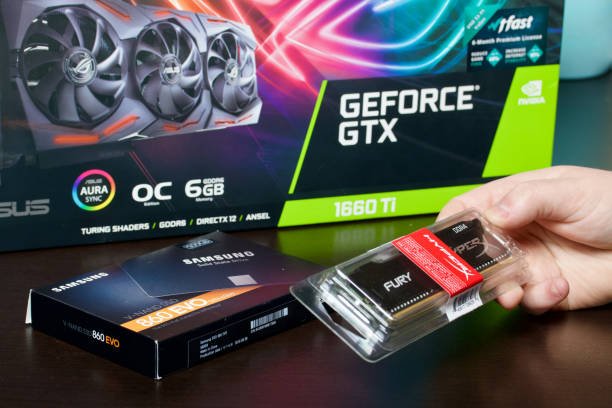
Step 2: Pick the Right Storage
Since we established an understanding of permissible components, we can proceed with selecting the best installation option.
Want lots of cheap storage? Go with a 2TB HDD.
Need faster game loading? Choose a 1TB SSD.
Looking for next-gen performance? Grab a 1TB NVMe.
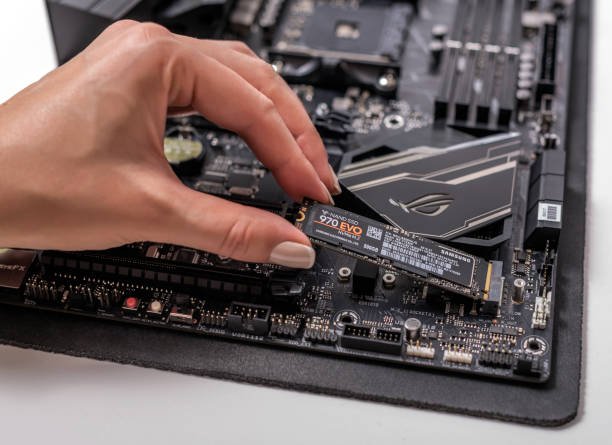
Step 3: Install the Drive
The installation of an HDD/SSD requires insertion into an empty bay by using screws or tool-less mechanisms. SATA power cables and SATA data cables serve as the connection requirements.
To install an NVMe SSD, one must properly place it into the M.2 slot while applying necessary pressure, followed by a single screw provided with the package for secure attachment.
Step 4: Initialize the Drive
Open your computer system and navigate to Disk Management by searching within the Start menu search bar to locate your new drive. Right-click and choose “Initialize Disk.” A drive initialization process using NTFS formatting will follow, which assigns a drive letter by the system.
Congratulations, you have mastered this information completely.
External Storage: Is It a Suitable Option for Gamers?
We recommend internal storage for maximum efficiency, although external storage devices can work when hardware limits you.
Most gamers should keep their game storage on external HDD devices while using this storage for backups or rarely played games.
A USB 3.1 (also known as USB-C) connected external SSD provides gaming performance levels on par with most gaming requirements of today.
The use of external drives results in occasional lag, which makes them more suitable for other games than competitive and first-person shooter games. A business should consider external solutions only after trying all its internal approaches for successful operation.
Managing and Organizing Game Storage
The information you acquire from How to Add More Storage to PC for Gaming should be followed by mastering the handling of How to Add More Storage to PC for Gaming.
The best practice for disk management involves putting operating system files on their drive while hardware-intensive applications exist on a different one.
Regularly uninstall unused games.
Game users can select the larger drive for new games by using custom install options in the game launchers.
Users should allow Disk Cleanup to remove temporary files and temp files through its management system.
Basic maintenance measures enable your gaming system to function like a fresh unit.
Game data storage during gameplay allows individuals to recover saved game progress when they finish playing or deal with power interruptions or battery-draining situations. The market debate over storage space requirements spanned from the 5th generation until the 7th generation of consoles since it directly affected manufacturing costs, which input manufacturers had to analyze.
People begin to ask this question the moment they learn about how to add More Storage to PC for Gaming. Here’s a general breakdown:
Casual gamer: 500GB–1TB is usually fine.
Regular gamer: Aim for 1TB–2TB.
Hardcore streamer: 2TB+ is your best bet.
My observation shows that modern video games continue to expand in dimensions. The collection can occupy substantial disk space because each game typically exceeds 100 GB, according to our assumptions. Plan accordingly.
These storage upgrade guidelines, together with safety precautions, must be followed during the process.
The thrill should never drive you into making bad choices through being overcome with emotions. Follow these safety steps:
When performing work inside the PC, users should first disconnect power and then completely turn off the machine.
You should become grounded first to eliminate static discharge so you can use anti-static wristbands.
The drive requires holding it by its sides and not allowing contact with connectors.
When you perform it safely as well as properly, you will feel satisfied about your knowledge.
Conclusion: Enhancing Your Gaming Environment
Insufficient disk space provides no reason to discard your favorite games because you can also install new games that you have wanted to experience for a long time. For improved carrier performance alongside better carrier convenience and future carrier system readiness, one needs to fully comprehend this process.
When choosing between an NVMe or a multiple-generation model and a large HDD for video game storage, you can efficiently manage your gaming operations. The straightforward procedures enable users to boost their PC storage capacity, while their games will reward them for this action.
FAQs
My personal computer allows the addition of multiple storage drives—are there any alternative methods to achieve this?
Yes! Most desktops support multiple drives. SSDs and HDDs can be used together with each other to maximize storage flexibility by obtaining both increased speed and larger capacity.
The addition of more storage improves system performance, but does it automatically boost the gaming frames per second?
Not directly. The storage drives of your personal computer primarily link to your GPU and your CPU, which stand for graphics processing unit and central processing unit. The game loading speed and stutter occurrences decrease with faster storage capacity, which improves the gameplay smoothness.